Managing a study on the dashboard
In this tutorial, we demonstrate how to use AWARE to run a user study. You will need to first authenticate on AWARE’s dashboard here: https://api.awareframework.com. We support Google’s OAUTH account login due to the tight coupling between Android and Google accounts. Additionally, besides our HTTPS connection encryption, this authentication method’s (OAUTH) security is handled by Google.
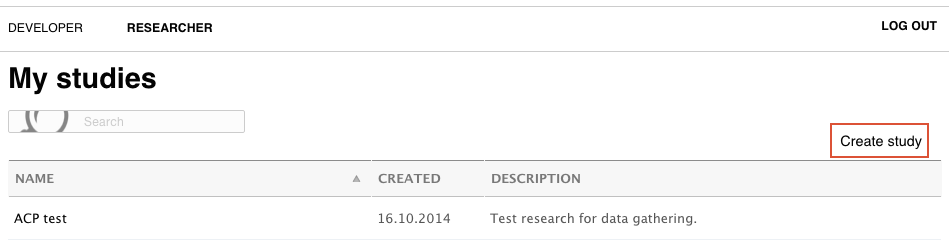
Once logged in, you have two tabs:
- Developer: this is where you can add plugins you built and want to use on your studies. Additionally, you can share your plugin publicly and upon code-review we make the plugin available to everyone. We talk about this further down on this tutorial.
- Researcher: this is where you can create studies (highlighted with the red rectangle).
Creating the study
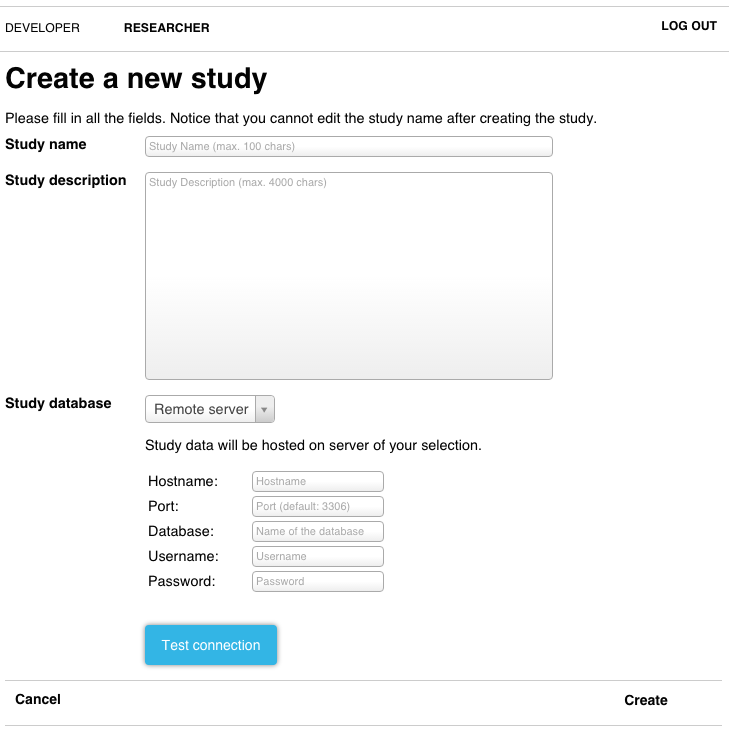
When you create the study, you must provide it a name. This name does not need to be unique amongst your study names. The study description is the information the participants will see when they try to join the study. This should be a concise description of the study and it’s goals. Lastly, you specify where the database will be hosted. We offer free hosting for you or you can host your own MySQL database. Use the “Test connection” button to make sure everything is working between AWARE’s server and your server.
With a remote server setting, AWARE’s dashboard becomes a MySQL client to your server, where the data sync queries are executed. We do NOT tamper with or intercept the data sent to your server. In this mode, you will need to allow remote access to the user you specified to your database. If you wish, you may also encrypt your database with a key that only you know (see encrypting database).
Configuring the data collection on the study

By default, when a study is created, its status is “Open” thus anyone can join by scanning the QRCode. When switching the status to “Closed,” the participants will be notified that the study has ended and their client is reset. To add data sources (sensors/plugins) to the study data collection, you need to edit the active sensors.
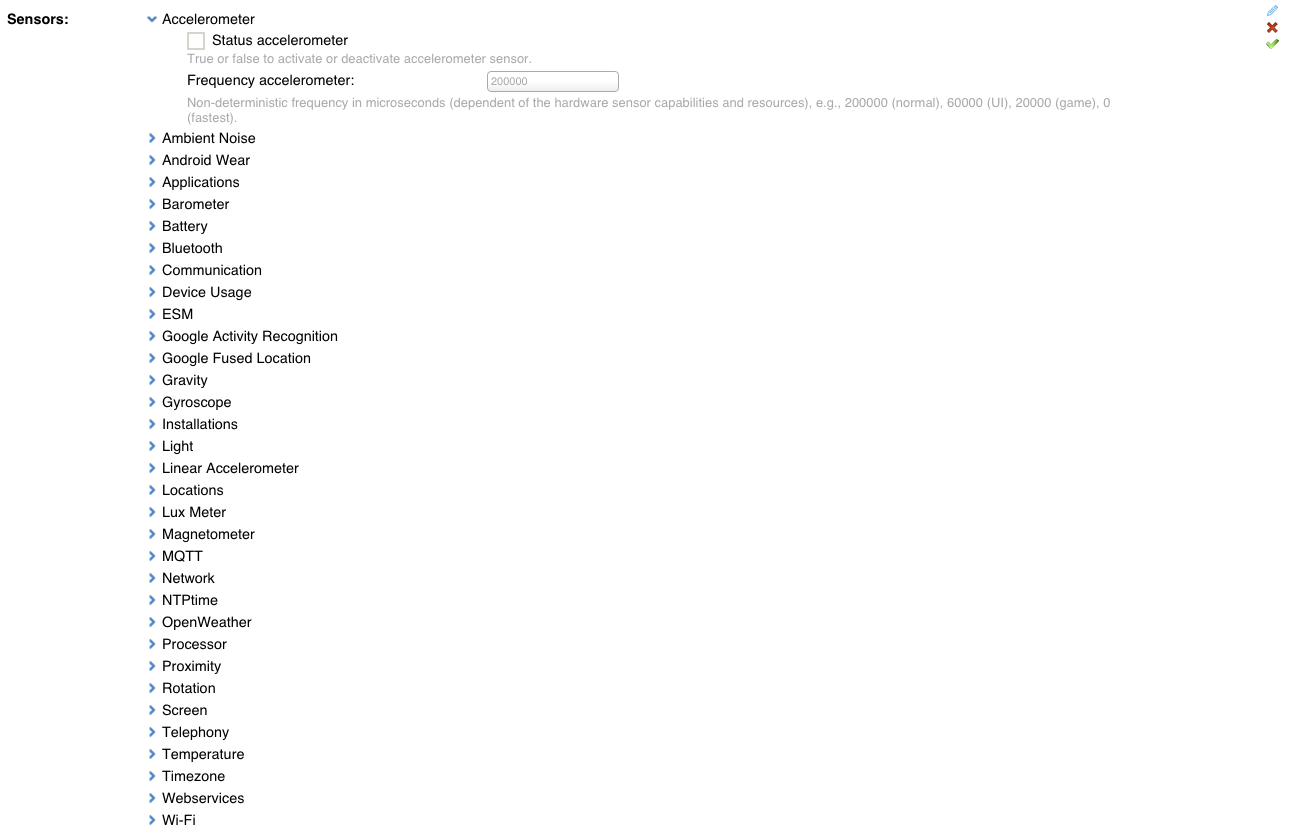
Every time you edit these settings, if a participant is already enrolled, the participants’ client receives and applies the new settings automatically. The public plugins are also available here. To add a private plugin to this list, you need to edit your plugin and add the study API key.
Checking the study status
The visualisation and devices sections become visible as participants enrol on this study and their data is sent. We have available (as beta) a visualisation toolkit built-in which allows you to quickly create visualisations of the study data. Keep in mind this is work-in-progress and functionality is limited. Since you have access to the MySQL server whether you use AWARE’s server or your own, you may use RStudio for example for generating more powerful visualisations and data analysis.
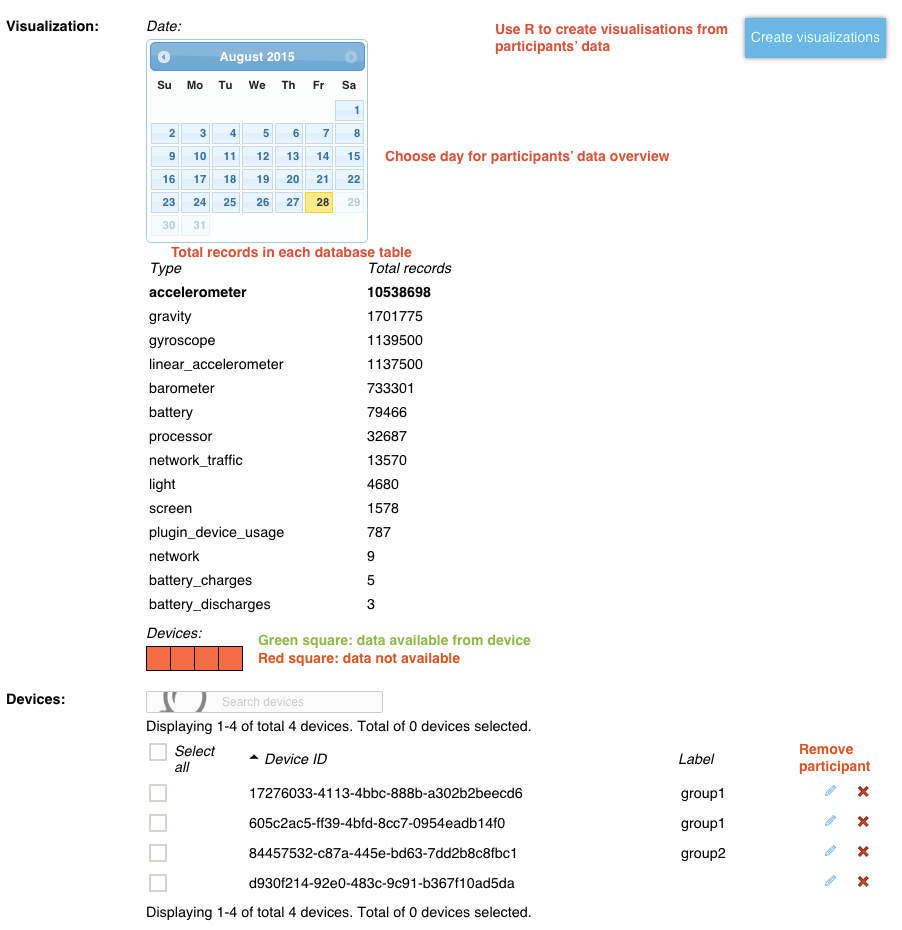
In order to know if a participant has sent data on a given day, you may use the calendar to query for the existence of data records in a given table. Devices shown in green have records, in red otherwise. On the list of devices, you can assign human-readable labels to a specific device. These labels are stored and used for this specific study. You can remove a participant if needed, deleting the participant’s data effectively and immediately.
Interacting with participants
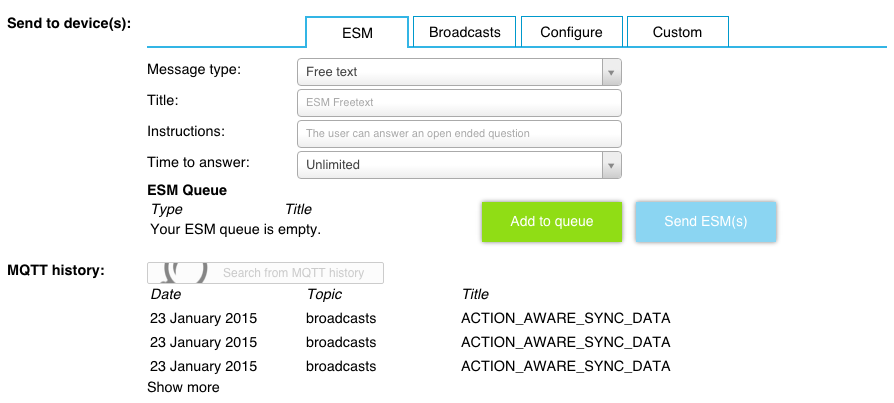
You may interact with the participants remotely. Select the designated participants and you may send them remote questionnaires (ESM), broadcasts, variant configurations, or a custom message:
- ESM: allows you to remotely request participants to fill in a questionnaire, where you may create a queue of questions. These can be free-text, single choice (radio), multiple choice (checkbox), quick answers and scales. See here for more information.
- Broadcasts: allows you to remotely request participants’ data to be synched or reset the data collected.
- Configure: allows you to create a personalized configuration, i.e., change the sampling rate of a sensor because it is not power efficient on that specific participant.
- Custom: allows you to send custom messages to the participant phone. If a plugin is created that listens to these messages, further functionality can be performed independently of the dashboard commands.